I’m going to show you how you can set up Docker on your Ubuntu PC and start using it for WordPress development. Along the way, I’ll show you why you would want to do that. Then I’ll dive into the details and share step-by-step instructions.
So, why bother using Docker? After all, you could get by with a text editor and an FTP client.
That’s the approach I used when I first got into WordPress development. Back then, I would edit files on my own computer and upload them to the server. I’d do all my testing on the remote machine, on a separate WordPress installation.
While it worked, it was pretty uncomfortable. I soon got frustrated with the delays every time I wanted to test a small code change. So I was happy when I learned about WAMP.
Now I could run my LAMP stack on my Windows box, build the entire project, and then deploy it when it was done. Even then, there were some difficulties I had to work around.
For one thing, Windows and Linux have some subtle difficulties that tripped me up a few times. One obvious issue is the way they deal with file paths.
There are some features in PHP that address these differences, but it was still a pain. So my next step was to install Ubuntu on my PC. Now I could develop in a native Linux environment. In fact, I could set it up so it was virtually identical to my web server,
This was great for my own projects, but I ran into major difficulties the first time I worked for a client.
Dependency Hell
The client in question was running an old version of PHP on their server. In fact, they had old versions of everything – MySQL, Apache, Linux, the works.
Unfortunately, they couldn’t update their server software because that would break all their code. Suddenly I found myself in a situation where I couldn’t code on my Linux box and upload the code when I was done. All because the packages on my PC were up to date.
I’d just taken my first bold step into the nightmare that developers affectionately call “dependency hell”. It took me several days to come up with a workaround.
Virtualization
After some frenzied research, I realized I would have to use a combination of Virtualbox and Vagrant to recreate the conditions on the server. Virtualbox is a free tool from Oracle that allows you to run virtual machines on your computer.
This allowed me to run a separate instance of Linux alongside my native system. I could set it up just right, duplicating all the eccentricities of my client’s out of date server.
Vagrant is a great tool that simplifies the process of running multiple VM versions.
Even then, it wasn’t easy. The version of PHP on the client’s box was so long in the tooth that it wasn’t available in any of the repositories. Instead, I had to track down the old source code and compile it from scratch. And that meant tracking down outdated versions of every library used by PHP. All-in-all, I spent 5 days setting up the environment so I could reach square zero.
Nonetheless, once I finally got things set up, the rest of the job was smooth sailing. And from that point on, Vagrant and Virtualbox became my indispensable web dev buddies.
That is until Docker appeared on the scene.
Why Docker?
So, why should you use docker? After all, virtual machines offer all the advantages I mentioned above. Of course, one reason why you may feel tempted is because of the popularity.
After all, much as we may try to deny it, every profession is prone to following trends. We all want to do what the “cool kids” are doing, and web developers are not immune.
Docker has grown to be one of the most popular open source projects over the last few years, so it certainly has popularity going for it. But there are very real reasons for that popularity.
Let’s examine some of these:
Less Overhead
Running a virtual machine gives you ultimate control over your development environment. But that control comes at a cost – running a second OS inside your host OS requires plenty of resources. A virtual machine has all the requirements of a physical one. It demands processor time, memory, disk space, and so on.
A modern OS is quite a big beast, and Linux is no different. After all, it’s designed to run in many different conditions, and deal with every requirement a user could have.
Docker isn’t a virtual machine. It doesn’t create a “pretend computer” that attaches itself to your PC, leaching the resources and slowing your machine to a crawl. Instead, it uses clever tricks to execute your apps and dependencies through the existing Linux kernel – the one that started when you booted your Ubuntu machine.
So the performance is much better. Your machine is under less strain, and so applications run fast – that includes the code you are working on as well as your regular apps outside the container.
Working on a responsive machine is much nicer than struggling with an unresponsive PC. And it’s better for your productivity, too.
Packaging
Docker wraps your app into a single object which you can deploy as a complete entity. All your dependencies, settings, and configurations are neatly bundled into a single package that you can deploy to any platform capable of running Docker.
This immediately reduces the headaches of deployment, which can be considerable. Hours (or even days) can be wasted fine tuning your production and development environments to get your application running right.
In a worst case scenario, you may find a new application is completely incompatible with essential apps that are already running on the server. In that case, you have to spend days or even weeks tweaking your new app to run on the production machine.
Of course, this is more of an issue for developers working on custom apps – WordPress tends to lower the integration headaches by providing a relatively stable platform to develop on.
For instance, a relatively simple unambitious plugin or theme should work with most versions of WordPress, as the WordPress API is quite reliable. But then again, how many real-world projects are “relatively simple”?
In reality, you’ll come to love Docker for reducing the pain of deployment.
Application-Oriented
As I mentioned, there are plenty of existing solutions for virtualization. These well-known and battle-tested projects have been a mainstay of IT departments for years now. But they are mostly server-oriented. They’re designed for their primary users – server administrators who deal with multiple physical boxes.
That’s why these projects are geared towards provisioning. They automate the manual tasks a server admin would have to do by hand when they set up a new server environment.
As developers, we have different priorities. For us, the application is the most important component. The rest of the server architecture is something we would rather take for granted.
With more traditional server provisioning tools (such as Puppet) we would inherit a large mass of overhead that we don’t need or want. Docker does away with this added complexity by focusing our attention on the job at hand – developing our applications.
Version Tracking
Any developer with more than a couple of projects under their belt knows the value of version tracking. Before the age of version control systems, keeping track of different versions of source code files was a major pain.
Development is an evolutionary process. As we code new features and fix bugs, we constantly change the codebase we are working on. Change is good, but it’s also a source of all kinds of problems. Fixing one bug often adds two or three additional ones. And they aren’t always immediately apparent.
Tracking down which change caused a specific bug can be hard for a single developer. When a team is working on the project, the problem can be magnified by several orders of magnitude.
That’s why git is such an indispensable tool, for single developers and teams alike.
Version tracking is essential for individual source code files. And it’s essential for different versions of your themes and plugins, too. That’s why Docker’s built-in version tracking is a Good Thing.
Public Registry
I’m sure I don’t have to convince you how valuable open-source development is. As a WordPress developer, you gain a massive head start by building on the work of others. Every component in your stack is a complex piece of software that you don’t have to code yourself.
Docker’s registry makes it easier to share code with the community – and to benefit from the work other developers have made available!
What’s more, you aren’t just sharing code snippets or individual files – you can download complete micro-services and even complete WordPress installations. This gets you off to a running start the next time you begin a project.
This is just a small taste of the many benefits that docker brings to the table. While I could go on and spend the rest of this article listing the virtues of Docker, I think you get the point.
So, let’s look at how you can get started
Installing Docker
One of the virtues of using Ubuntu as a development platform is the ease of installing popular packages. And Docker is certainly a popular package!
As long as your machine is connected to the Internet, you can install Docker with a few apt-get commands in the terminal.
But, before you do that, it’s worth doing a little housekeeping.
First, let’s ensure your system meets the minimum requirements. Docker only works on 64 bit systems. And it requires Linux kernel version 3.10 or later. You can check the kernel version in a terminal by typing:
uname -r
The first few digits are the version number – as long as it’s 3.10 or greater, you’re good to go.
The next step is to update your PC’s list of repositories, so it can fetch the latest and most stable versions of the packages you will be installing. You can do this with a single terminal command:
sudo apt-get update
The screen will fill with a bunch of text as APT fetches up-to-date package lists from its repositories. It usually only takes a few seconds.
Next, you have to ensure that APT can install packages over https, using CA certificates. You can install these features with:
sudo apt-get install apt-transport-https ca-certificates
This could take a few minutes depending on how many packages APT has to install.
The next step is to install the GPG key. GPG stands for Gnu Privacy Guard – this is the system that APT will use to decrypt the Docker packages and ensure they are legitimate.
Type the following into the terminal:
sudo apt-key adv --keyserver hkp://p80.pool.sks-keyservers.net:80 --recv-keys 58118E89F3A912897C070ADBF76221572C52609D
The next step is to add the Docker repo to APT. You do this by editing or creating a file under /etc/apt/sources.list.d/docker.list
The file is a single line, which contains the address of the repo. You have to enter the correct address for the version of Ubuntu you are using – in our case, we’ll be using the repo for Ubuntu 16.04.
Type the following lines into your terminal:
sudo -i

echo "deb https://apt.dockerproject.org/repo ubuntu-xenial main" > /etc/apt/sources.list.d/docker.list

exit
Now you have to update APT’s repo list again, with:
sudo apt-get update
If you had previously installed an old version of docker, you’ll have to purge it with:
sudo apt-get purge lxc-docker
Now let’s check that APT is pulling from the correct repo with:
apt-cache policy docker-engine
You should see a list of packages for Ubuntu Xenial.
Now you can install Docker’s dependancies. Type:
sudo apt-get install linux-image-extra-$(uname -r) linux-image-extra-virtual
This will install the appropriate Linux image extras package for your kernel version.
Ubuntu 16.04 and above already have most of the other dependencies for Docker. If you’re using an older version of Ubuntu, you’ll have to install the other dependencies manually. You can find a list at:
https://docs.docker.com/engine/installation/linux/ubuntulinux/
Finally, we’re ready to install Docker! All you have to do is type:
sudo apt-get install docker-engine
Sit back and let APT do its magic. If APT runs into any problems (such as missing dependencies) it will give you a helpful description of what went wrong. If you have any missing dependencies in the list, you’ll have to install them one by one using sudo apt-get install.
You may have to reboot your machine after installing these dependencies, especially if they included a new Linux kernel.
As soon as APT finishes the installation, you can start the docker daemon:
sudo service docker start
Finally, test it with:
sudo docker run hello-world
This will run a test container and print a simple message to the terminal.
So, you have Docker installed. The next step is to install Docker Compose. Docker compose is a useful tool for running docker applications, and it simplifies your workflow. It also allows you to compose applications from multiple containers that communicate with each other. This is called a micro-service architecture – but that’s beyond the scope of today’s article.
Docker Compose isn’t in the regular Ubuntu repos, so you’ll have to install it from the GitHub repository. The exact installation instructions vary with each new release, so you should check them out at https://github.com/docker/compose/releases
Here are the steps I followed as I was writing this article:
sudo -i

curl -L https://github.com/docker/compose/releases/download/1.8.1/docker-compose-`uname -s`-`uname -m` > /usr/local/bin/docker-compose

chmod +x /usr/local/bin/docker-compose

exit
Now, let’s set up a WordPress environment. Previously, I told you that one of the benefits of Docker is the way other users share their environments to speed up your development work.
There are plenty of WordPress containers you can choose – the one I picked for this article is from visible.vc. They’ve shared it on GitHub, so you can quickly clone the project to your computer:
git clone https://github.com/visiblevc/wordpress-starter your-project-name

cd your-project-name
Now all you have to do is run the container in Docker:
docker-compose up
Docker Compose will download the docker image and start running it. It will take care of all the dependencies, from the MySQL database to the Akismet WordPress plugin.
And there you have it – your own fresh WordPress install, running on localhost:8080.
Using Your WordPress Container
Right now, we have a bare-bones WordPress installation. You probably intend to do more.
So the next step is to start sharing directories between your PC and the Docker package. This allows you to edit the files on your machine, and run them in the package.
You can control the directory sharing from the docker-compose.yml file. This is a simple YAML file that contains all the settings you need. YAML is a lightweight human readable data format, so you’ll have no difficulty getting to grips with it.
Open it up in your favorite editor, and turn your attention to the “volumes” section at the end. Right now it says:
data: {}
We want to change that to share directories from the project. You should already have a directory containing a starter theme in the ./wp-content/themes/the-theme directory. You might want to rename that later, but for now, let’s use it as it is.
Replace the contents of the volumes section with:
- ./data:/data
- ./wp-content/themes/the-theme:/app/wp-content/themes/the-theme
Inside the container, the directory appears as /app/wp-content/themes/the-theme. WordPress sees this as one of the installed themes, and you can use it in the normal way.
You can also setup the WordPress database to your likings by editing the contents of /data/database.sql before you run docker-compose up. You can also use the WP Migrate DB plugin, just like you would with any other working WordPress installation.
There are more instructions for this container at https://github.com/visiblevc/wordpress-starter.
Conclusion
So, you’ve learned why you should use Docker, and you’ve set up your first WordPress development container. You’ve taken your first steps towards a more streamlined and stable workflow! There is more to learn about Docker, but you know enough to get started on your first project. Happy coding!
source: HERE


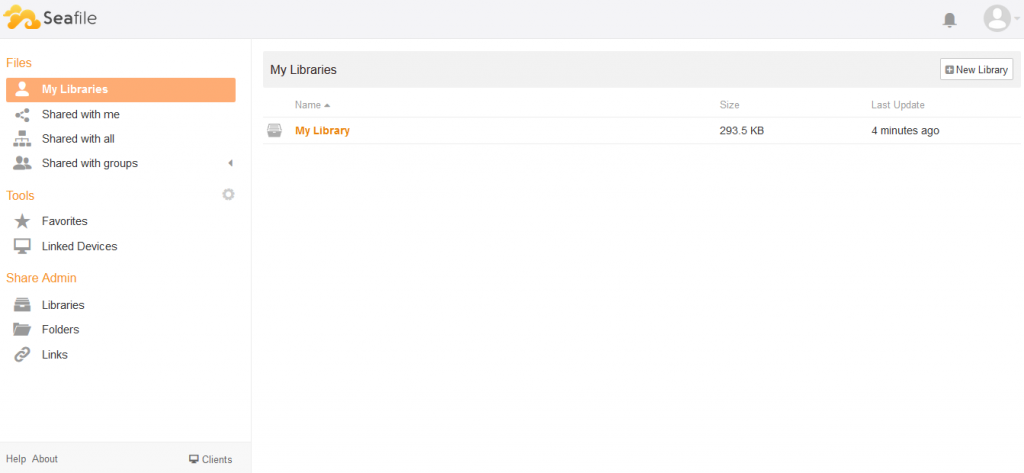
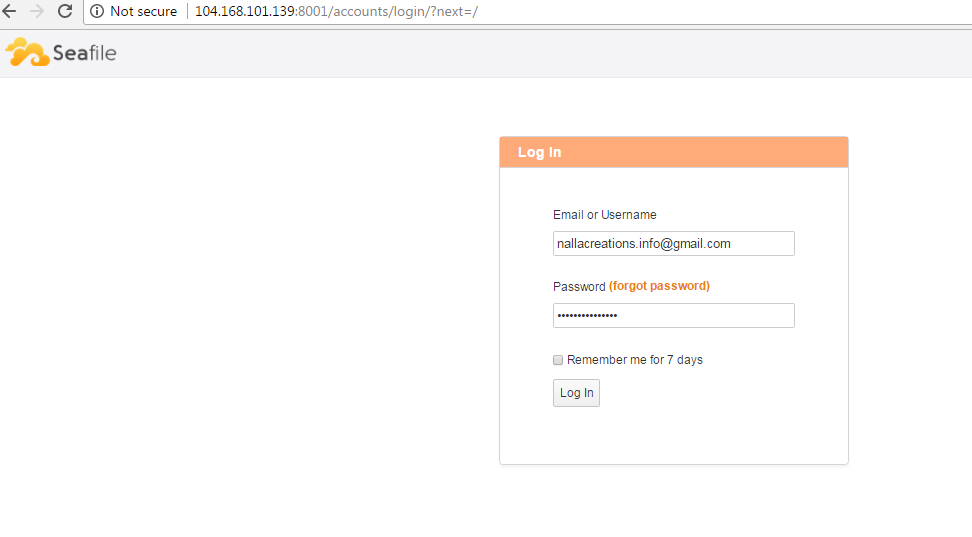 The SeaFile SeaHub dashboard will look like below